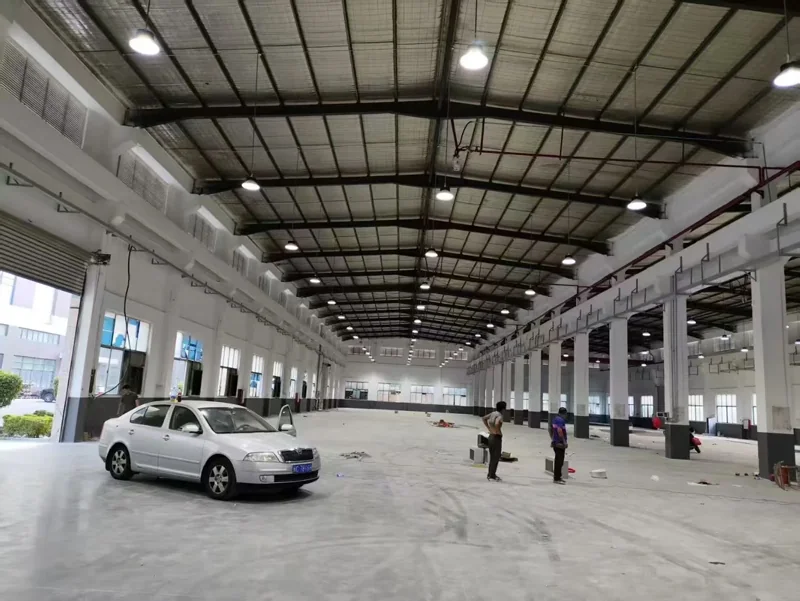
The LED equivalent of a 400W metal halide high bay is 150–200 W of LED, delivering roughly 22,500–30,000 lm at 150 lm/W. That replaces a fixture that actually draws about 455 W from the circuit once the ballast is counted.
That band is the same one in our LED high bay retrofit guide, which covers every common HID wattage and the full retrofit checklist. This article stays on the single most common case, the 400 W metal halide bell, and shows where the number comes from. That matters because “400W equivalent” is printed on fixtures from well below 150 W to well above 200 W, and only one of them is right for your building. The way to find it is to work from the light your old installation really delivered, not from the label on the lamp.
Key Takeaways
- A 400 W metal halide high bay is replaced by 150–200 W of LED. Compare against about 455 W of system input, not the 400 W lamp rating.
- Metal halide lamps are sized by their initial lumens but spend most of their life well below them. A replacement should match the light that reached the floor, not the lamp’s catalogue figure.
- Where you land in the 150–200 W band depends on mounting height, fixture grid and target illuminance. Tighter grids and lower targets sit at 150 W; wider grids or higher targets need 200 W.
- A fixture far below 150 W sold as a “400W equivalent” delivers proportionally fewer lumens. In the worked example below, a 100 W unit holds about 119 lx where the old system measured 180 lx.
- Bypassing a ballast to fit an LED retrofit kit changes the fixture’s certified construction. It is a job for a qualified electrician, with the conversion documented and the fixture marked.
The Answer: 150–200 W, and What Moves It
For a standard indoor high bay, the site-wide answer is:
| Legacy fixture | System input (with ballast) | LED replacement | Output at 150 lm/W |
|---|---|---|---|
| 400 W metal halide high bay | ≈ 455 W | 150–200 W | 22,500–30,000 lm |
Four conditions decide whether a building needs the bottom or the top of the band:
| Condition | Pushes toward 150 W | Pushes toward 200 W |
|---|---|---|
| Mounting height | Lower end of 8–12 m, or below | Upper end of 8–12 m |
| Fixture grid | Tight (spacing below 1.0 × height) | Wide (spacing at or above 1.0 × height) |
| Target illuminance | Matching what the old system measured | Raising the level to a new specification |
| Room surfaces | Light walls and deck | Dark racking, dark roof, dusty air |
The grid condition catches most people out. A retrofit usually keeps the existing hook positions, and those were laid out around a 400 W lamp. If the old designer put fixtures close together, each LED fixture has less floor to cover and 150 W is often enough. If they were spread wide, 200 W is the realistic figure. For a new layout designed from scratch, the height-based starting points in high bay wattage by ceiling height apply instead. At 8–12 m those put a 200 lx design at 200–300 W per fixture, because they assume wider spacing than most old metal halide grids used.
Nameplate Watts vs System Watts
A 400 W metal halide lamp does not draw 400 W from the building. It needs a ballast to start it and limit its current, and the ballast consumes power of its own.
The figure used across this site is about 455 W of system input for a 400 W metal halide fixture. That reflects the magnetic ballasts found in most older high bays. The figure you should use for your own building is the input wattage printed on the ballast label, or a clamp-meter reading taken at the fixture once the lamp has fully warmed up.
An LED fixture’s rated wattage already includes its LED driver, so 150 W on the datasheet is 150 W at the circuit. The honest comparison is 150–200 W against roughly 455 W.
Probe-start, pulse-start, and the lamp that is really in the fixture
Metal halide fixtures come in two starting technologies, and a building converted over decades may contain both.
- Probe-start lamps use a starting electrode inside the arc tube. They are the older design, common in installations from before the late 2000s.
- Pulse-start lamps use an external ignitor that fires a high-voltage pulse to strike the arc. They generally run more efficiently and hold their light better through life.
In the US, federal efficiency standards for metal halide fixtures under the Energy Independence and Security Act of 2007 took effect in 2009. They steered new fixtures in the 150–500 W range toward pulse-start systems. Details and later revisions sit with the US DOE Appliance and Equipment Standards Program.
This matters for the audit because a fixture sold as “400 W” may now hold a lower-wattage lamp. Reduced-wattage pulse-start lamps, such as 320 W and 350 W, were widely fitted as energy upgrades into 400 W positions. Before sizing anything, open a representative fixture and read the lamp and ballast labels. A 320 W pulse-start system is a different starting point from a 400 W probe-start one.
Initial vs Mean Lumens: What Metal Halide Actually Delivered
Lamp catalogues publish two lumen figures for metal halide, and the gap between them explains most of the confusion about equivalents.
- Initial lumens are measured after a short burn-in, when the lamp is new.
- Mean lumens are the output at 40% of rated life, the industry’s convention for a representative mid-life value.
As typical catalogue data, a 400 W probe-start lamp lists roughly 36,000 initial lumens and mean lumens in the low-to-mid 20,000s, so it spends much of its life at around two-thirds of its rated output. Pulse-start lamps of the same wattage typically list more initial lumens and hold a larger share of them. Exact figures vary by manufacturer, lamp type and burning position. Many metal halide lamps also lose output when burned horizontally rather than base-up, and their colour drifts as they age.
Two practical consequences follow.
The original design was sized around tired lamps. A metal halide installation that met its target at mid-life had to start well above it. Sizing an LED replacement to the lamp’s initial lumens pays for light the building rarely received.
Your “before” measurement depends on where the lamps are in life. A space measured just after group relamping looks far better than the same space a few years later. Record lamp age alongside any lux readings, or the comparison will flatter one side.
LED behaves differently. Output declines slowly over a much longer life, and the rate is documented through L70 rated life figures. Our high bay range is rated beyond 50,000 hours. A design using a maintenance factor of 0.8 still meets its target at the end of the maintenance cycle, which is why the worked example below applies one.
The Equivalent Depends on the Application
“400 W metal halide” describes a lamp. Several very different fixtures used it, and the LED replacement follows the fixture’s job rather than the lamp.
| Application | What the old fixture did | LED starting point | What decides the final answer |
|---|---|---|---|
| Indoor high bay | Reflector bell over a floor grid | 150–200 W | Mounting height, grid, target lux |
| Floodlight on a building or low pole | Open-face flood aimed at a yard or facade | 150 W class | Aiming angle and beam spread |
| High-mast head | One of a ring of floods at height | 150–200 W | Aiming table, outdoor maintenance factor |
| Pole-top area light | Horizontal lamp in a shoebox-style head | No single number | Light distribution type and pole spacing |
The flood row has measured evidence behind it. Our 150 W LED flood light tested at 20,422 lm and 143.4 W on a calibrated goniophotometer, 142.3 lm/W with a 59° beam. The report is downloadable from the LED flood light range. For high-mast heads, the high mast retrofit guide uses the same 150–200 W band and adds the structural and aiming checks that masts need. Pole-top area lights need a calculation against the pole spacing, because the distribution matters more than the wattage.
Why directional optics need fewer lumens
A metal halide arc tube emits in all directions. The fixture relies on a reflector to turn that light toward the floor, and some of it is absorbed or trapped inside the housing on the way. In a high bay, a share of what does escape lands on upper walls and the tops of racking.
An LED high bay starts with emitters that face downward and a lens or reflector designed for a specific beam angle. More of each emitted lumen reaches the working plane. That is why a lumen-for-lumen swap against the lamp’s rating overshoots, and why the useful comparison is light on the floor. Fixture-level luminous efficacy of 120–160 lm/W across our high bay range covers the other half: fewer watts for each emitted lumen.
Worked Example: From Measured Lux Back to LED Wattage
The most reliable way to size a replacement is to start from what the existing installation actually delivers, then work back to lumens and watts. Every input below is stated, so you can substitute your own.
Inputs
| Input | Value |
|---|---|
| Existing fixtures | 400 W metal halide high bays, kept on existing hook positions |
| Mounting height | 10 m |
| Grid | 9 m × 9 m, so 81 m² of floor per fixture |
| Measured average illuminance | 180 lx at floor level, taken at night on a grid, lamps at mid-life |
| LED efficacy | 150 lm/W |
| Utilisation factor (UF) | 0.8 |
| Maintenance factor (MF) | 0.8 |
Step 1: light reaching the floor today. 180 lx × 81 m² = 14,580 lm per fixture position. For comparison, that is about 40% of the typical 36,000 initial lumens printed for a 400 W probe-start lamp. Lamp depreciation, fixture losses and light on walls account for the rest.
Step 2: LED lumens to match that level for the life of the installation. Divide by UF and MF: 14,580 ÷ (0.8 × 0.8) ≈ 22,800 lm.
Step 3: convert to watts. 22,800 ÷ 150 ≈ 152 W. A 150 W LED high bay matches the old level, holding about 178 lx maintained (22,500 lm × 0.64 ÷ 81 m²).
Step 4: if the specification asks for more. If the new target is 200 lx maintained: 200 × 81 ÷ 0.64 ≈ 25,300 lm, or about 169 W. That sits between catalogue steps, so the choice is 200 W. It delivers about 237 lx maintained at full output, or it can be dimmed to 200 lx and brought up as it ages.
Step 5: sanity-check the grid. Spacing of 9 m at a 10 m mounting height is a ratio of 0.9. That sits inside the 0.8–1.0 window for 60° optics and just under the 1.0–1.2 window for 90° optics, so a 60° beam is the safer choice for uniformity. The full method is in the high bay light spacing guide.
Both answers land inside the 150–200 W band: the same building needs 150 W to match its measured level and 200 W to reach a higher specification. Averages hide uniformity, so final sign-off belongs to a calculation with the fixture’s IES file.
Why a Much Lower “400W Equivalent” Does Not Hold Up
LED high bays well below 150 W are sometimes described as 400W metal halide equivalents. The label can reflect a comparison made under different conditions, such as a lower mounting height, a tighter grid or a lower target. The arithmetic is what should decide whether it holds for your building.
Run a 100 W fixture through the same example at 150 lm/W:
| LED fixture | Lumens at 150 lm/W | Maintained lux on the 9 × 9 m grid | Compared with measured 180 lx |
|---|---|---|---|
| 100 W | 15,000 lm | ≈ 119 lx | Noticeably darker |
| 150 W | 22,500 lm | ≈ 178 lx | Matches |
| 200 W | 30,000 lm | ≈ 237 lx | Brighter, or dim to target |
A higher efficacy claim does not close a gap that size on its own. Even at 160 lm/W, the top of our range, a 100 W fixture emits 16,000 lm, still well short of the 22,800 lm the example needs.
Three checks settle any equivalence claim, whoever makes it:
- Ask for measured fixture lumens, from a photometric test report on the complete luminaire rather than chip or lamp data.
- Ask what conditions the equivalence assumed: mounting height, spacing, target lux and maintenance factor.
- Run the lumens through your own grid using the steps above. If they come out close, the equivalence is real for your building; if not, the label describes somebody else’s.
New Fixture or Retrofit Kit?
Once the wattage is settled, the next decision is what physically goes on the hook.
| Option | What it involves | Where it fits | What to watch |
|---|---|---|---|
| Complete LED high bay | Remove the old fixture, hang a new one on the existing hook and supply | Most 400 W metal halide high bays | Supply voltage, hook rating, cable length |
| LED retrofit kit | LED module and driver fitted inside the old housing, ballast removed or bypassed | Housings worth keeping, where the kit suits that fixture | Heat, sealing, certification of the modified fixture |
| LED lamp in the old socket | Screw-in LED lamp, often with ballast bypass | Rarely the right answer for a high bay | Old optical losses kept, heat inside a closed housing |
A complete fixture is the simplest to document. It arrives as a tested, certified product with its own photometric file, and an LED high bay is usually much lighter than the metal halide bell it replaces. Our LED high bay lights are built as complete luminaires, with IP65 sealing and a standard working temperature of -20°C to 45°C. The retrofit guide linked above explains why screw-in lamps inside old reflectors rarely deliver the numbers in this article.
Confirm the supply voltage before ordering. Our high bay drivers take AC100–277 V. Many North American industrial buildings run metal halide high bays on 347 V or 480 V circuits, and that needs to be stated at enquiry so the driver is matched.
Ballast bypass: a note on safety and certification
Any retrofit that removes or bypasses the ballast rewires the fixture. Treat it as electrical work with consequences beyond the day of installation.
- Use a qualified electrician, working to local wiring rules, with the circuit isolated and locked off.
- Assume stored energy. Ballast capacitors can hold charge after isolation. Pulse-start systems also contain an ignitor that produces high-voltage starting pulses, and it must come out of the circuit.
- Mark the fixture. After a bypass, the lamp holder or supply terminals may carry mains voltage directly. The next person to open the housing needs a label telling them so.
- Understand what happens to the certification. A fixture modified in the field is no longer the construction that was originally tested and marked. In many markets, a retrofit kit must itself be approved for that type of conversion, and the modified fixture must carry marking that says so. Check with the authority having jurisdiction and your insurer before converting a whole building.
Across a large building, that documentation and inspection burden often tips the decision toward complete fixtures.
The Bottom Line
The honest LED equivalent of a 400W metal halide high bay is 150–200 W, measured against about 455 W of system input. Your own building decides where in that band you land. Start by measuring the lux your existing installation delivers, with lamp age recorded, then run it through your grid at 150 lm/W and MF 0.8.
The one next action: send us your fixture layout, mounting height and before readings, and our engineers will return the fixture selection with an IES-based DIALux calculation for your grid. Warehouse-specific layouts and controls are covered on our warehouse lighting page.
FAQ
What LED wattage replaces a 400W metal halide high bay? 150–200 W of LED, roughly 22,500–30,000 lm at 150 lm/W. Use 150 W where the existing grid is tight or you only need to match the old measured level, and 200 W where fixtures are widely spaced or the new specification asks for more light. Confirm the choice with a calculation at your mounting height and spacing.
How many watts does a 400W metal halide fixture really use? About 455 W with a typical magnetic ballast, which is the figure used across this site. Electronic ballasts and reduced-wattage pulse-start lamps change it, so read the input watts on the ballast label or measure at the fixture once the lamp has fully warmed up. Compare LED fixture watts against that system figure, not against the 400 W printed on the lamp.
Is a 100W LED really equivalent to a 400W metal halide? Not in a typical high bay. At 150 lm/W a 100 W fixture emits about 15,000 lm. On a 9 × 9 m grid at 10 m it holds roughly 119 lx maintained, where the old 400 W system in the same example measured 180 lx. Lower wattages can work at lower mounting heights or tighter spacing, which is why the conditions behind any equivalence claim matter more than the claim.
How many lumens does a 400W metal halide lamp produce? As typical catalogue data, a 400 W probe-start lamp lists about 36,000 initial lumens and mean lumens in the low-to-mid 20,000s; pulse-start lamps list somewhat more. In the worked example above, only about 14,600 lm per fixture position reaches the floor, so size the LED from delivered light, not the lamp rating.
Does the 400W equivalent change for flood lights? The starting point is similar but the deciding factor is different. Our measured 150 W flood delivers 20,422 lm, which is a working replacement for a 400 W metal halide flood. The final choice depends on aiming and beam spread rather than a floor grid, so validate it with the IES file at your mounting geometry.
Can I reuse the existing hooks and wiring when replacing a 400W metal halide high bay? Usually yes. LED high bays are lighter than metal halide bells and draw far less current, so existing hooks and supply drops normally serve a one-for-one swap. Confirm the supply voltage matches the driver’s input range and have an electrician review the circuit. For a ballast-bypass kit, also confirm what the conversion means for certification in your market.