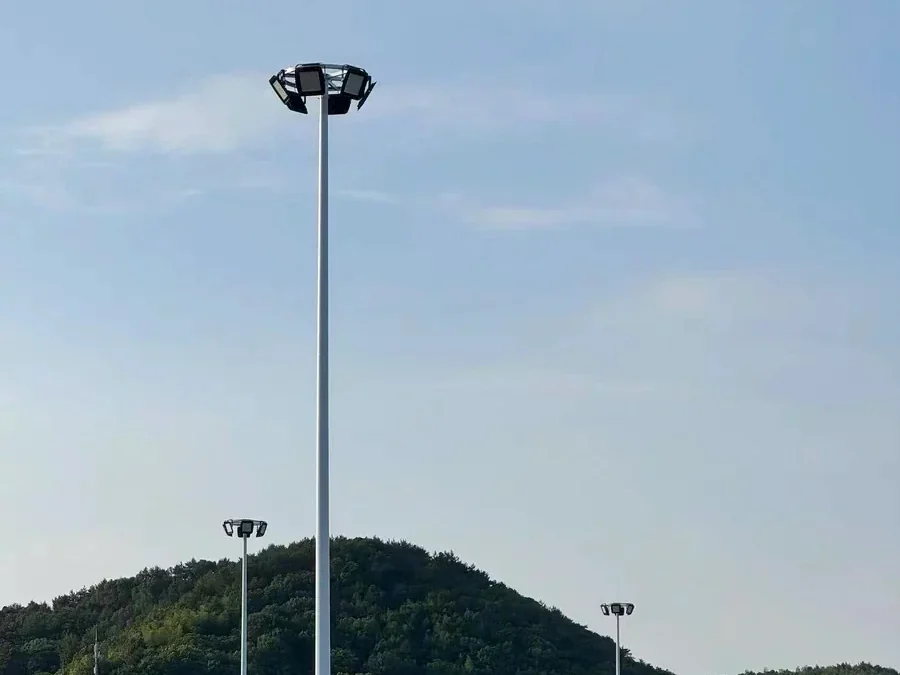
Parking lot lighting is sized by the lot, not by the fixture. A small staff or residential car park is usually lit by pole-top street or area heads on 4–6 m poles spaced 18–24 m apart. A mid-size public lot with free corners can run 10–12 m flood poles at the perimeter. A large retail lot needs poles inside the lot, typically twin heads on the landscaped islands, because perimeter poles cannot reach its centre. The light level is set by the governing code or the client brief, then proven by calculation.
Those answers are different layouts solving different problems. This guide gives the starting numbers for each, covers the security, control and spill-light issues that decide whether a car park lighting design works, and sizes a 120 × 60 m retail lot from lux target to fixture wattage.
Key Takeaways
- Pole height follows layout: 4–6 m poles at 18–24 m for low-level P-class car parks, 10–12 m for corner flood poles, and taller interior poles with pole-top heads when a large lot needs higher lux.
- Parking lot light pole spacing stays within about 3.5–4 × mounting height along a row, and nearer 3 × height across an open lot.
- There is no single parking lot lux level. EN 13201 P-classes, IES RP-20 criteria and owner specifications all differ, so state the standard and the condition before quoting a number.
- For security and CCTV, the minimum point, uniformity and vertical light on faces matter more than the average.
- Changing the layout rarely changes the installed watts much. What it changes is where the lumens land, how much glare drivers see and how much light crosses the boundary.
Parking Lot Lighting at a Glance: Starting Points by Lot Type
Use this table to scope a budget and a pole count. Every row still ends in a photometric calculation with the fixture’s IES file.
| Lot type | Light level basis | Layout | Pole height | Spacing | Fixture |
|---|---|---|---|---|---|
| Staff, residential or estate car park | EN 13201 P-class (parking areas typically P4–P5) | Pole-top street or area heads along aisles or the edge | 4–6 m | 18–24 m | 20–40 W, Type III or V |
| Mid-size public lot with usable corners (example: 80 × 50 m) | 30 lux average, the upper band for public parking used in our flood guide | Corner or perimeter flood poles | 10–12 m | Perimeter ≈ 3.5–4 × height | 100–200 W flood, 60–90° beam |
| Large retail or commercial lot (example: 120 × 60 m) | Owner or local code; our flood guide lists 20–75 lux maintained for car parks and open yards | Interior poles with twin back-to-back heads on islands | 8–10 m | Along the row ≈ 3–4 × height | Wattage from the lumen method (see worked example) |
| Very large lots, truck and coach parks | Per project study | High-mast | 20 m and above | Per study | Multi-flood ring, project-specific |
Three conditions travel with every number in that table.
The P-class row is low-level lighting. EN 13201 pedestrian classes run from P1 at 15 lux average down to P6 at 2 lux, each with a minimum-point requirement. That is enough to walk safely to a car, not the level a retailer usually wants across a busy evening lot. The class method is in our EN 13201 roadway lighting design guide.
The 30 lux figure has a context. It is the average target used in the LED flood light selection guide for a public car park lit from corner poles: a design input, not a legal minimum.
Your local code wins. North American projects often work to IES RP-20, which frames parking criteria around minimum illuminance and maximum-to-minimum ratios rather than an average alone. European projects cite EN 13201 or national guidance, and planning conditions may add limits. The metric changes the layout, not just the wattage.
Why the heights look contradictory, and are not
Our street light pole height and spacing chart lists car parks on 4–6 m poles at 18–24 m; the flood guide puts corner poles at 10–12 m. Both are right. The first is many short poles with low-wattage heads pointing down, footpath hardware. The second is a few tall poles with tilted floods throwing 40 m or more. Short poles buy low glare at the cost of more foundations; tall corner poles buy a pole-free surface at the cost of tilt, glare and limited reach.
Pole Layout Patterns: Perimeter, Centre Island, Grid
Perimeter and corner poles
Poles stand outside the parking surface, on the boundary or in corner planting, so nothing obstructs vehicles and cabling stays at the edge. The limit is reach. In the flood guide’s 80 × 50 m example the long side is already 80 m pole-to-pole at 12 m (6.7 × height), and a second cross-aimed flood per pole repairs the middle. Stretch the lot to 120 m and corner poles sit 10 × height apart. No aiming closes that gap with acceptable glare, so larger lots move poles inside.
Centre-island poles with twin heads
Poles stand on the landscaped islands between back-to-back bays, each carrying two heads 180° apart. Each head throws across its own aisle and covers the ground behind the other; a row of single forward-throw heads stripes the lot light and dark. Islands also protect pole bases from vehicle strikes.
Grid of single-head poles
Poles on a regular grid, each with a symmetric Type V head. It suits lots without islands and gives the most even horizontal light, but puts the most poles in the traffic path.
| Pattern | Best for | Watch for |
|---|---|---|
| Perimeter / corner | Lots up to roughly 80 m on the long side, sites where the surface must stay pole-free | Tilt glare, spill across the boundary, poor reach to the centre |
| Centre island, twin heads | Retail and commercial lots with planted islands | Island positions fixed by the civil layout, cabling across the lot |
| Grid, single Type V | Open painted-bay lots, logistics yards | Vehicle strikes, more foundations |
Fixture Choice: Pole-Top Area Heads vs Flood Lights
These are the two fixture families behind LED parking lot lights, and they are good at different things.
Pole-top street and area heads mount flat, with the optic doing the aiming. In the IES distribution types, Type III throws forward and wide from a pole at the edge of the area it lights, Type IV throws further forward with less light behind the pole (the classic perimeter choice next to a neighbour), and Type V spreads symmetrically from poles in the middle. A horizontal head keeps the bright source shielded from drivers and uplight low. Our SJLD LED street light series runs from 20 W to 480 W with IES/LDT files for every series; tell us the pole position and boundary condition and we match the distribution for that model.
Flood lights mount on brackets and are aimed by tilting. They win when poles can only go at corners or on buildings, because a beam angle of 60–90° fits a 20–40 m throw. The cost is that tilt lifts the bright aperture toward drivers and neighbours, which is why the flood guide caps tilt at about 70° from vertical. An LED flood light at corner-pole duty is typically 100–200 W. Our calibrated goniophotometer reports for the 150 W and 200 W units, downloadable from the LED flood lights pages, measured 20,422 lm at 143.4 W (59° beam) and 35,309 lm at 201.3 W (60° beam).
| Pole-top area head | Corner flood light | |
|---|---|---|
| Mounting | Flat, on arm or slip-fitter | Bracket, tilted |
| Aiming | Built into the optic (Type III / IV / V) | Set on site by tilt and rotation |
| Glare to drivers | Low: source shielded | Higher: rises with tilt |
| Poles needed | More, shorter or mid-height | Fewer, taller |
| Best for | Interior poles, islands, low-level P-class lots | Pole-free surfaces, corner-only sites |
Security: Uniformity, Vertical Light, Faces and Cameras
People judge a car park by its dark patches, not its average. Bright pools with gaps between them feel worse, and record worse on camera, than a lower but even level.
Check the minimum first. The uniformity ratio (minimum ÷ average) and the max:min ratio reveal those gaps. EN 13201 P-classes attach a minimum-point value to each average, and IES RP-20 criteria are written around minimums and max:min ratios. Read the minimum on the grid before the average.
Light the vertical plane. Recognising a face or a number plate depends on light arriving on vertical surfaces at head height, and EN 13201 offers semi-cylindrical illuminance options for this. A face is lit from the front only if a source sits in front of it: twin heads and overlapping rows light people from several directions, a single row of downward heads only from above.
Design for the cameras. CCTV handles an even scene far better than bright pools beside black shadows. Specify flicker-free drivers wherever cameras record, and CRI 80 or better so vehicle colours are recorded correctly; our flood and street ranges are CRI ≥80. For colour temperature, site practice is 4000K for car parks, with 3000K reserved for residential and wildlife-sensitive edges, as explained in 3000K vs 4000K street lights.
Controls: Photocell, Time-Step Dimming and Motion Boost
A car park lit dusk to dawn burns more than 4,000 hours a year, so controls are part of the design rather than an extra.
- Dusk-to-dawn photocell. This is the minimum: no lot should be lit at noon. Fit it per pole or per circuit.
- Time-step dimming. A retail lot needs full output through trading hours and far less after close. Stepping down on a schedule needs no sensors, only dimmable drivers and a timer or controller. Specify the dimming interface at order, because retrofitting drivers later costs more than the option.
- Motion boost. Hold a low idle level, commonly 20–30% so cameras still see, and ramp to full on detection. Match the sensor to the height. PIR detection of pedestrians becomes unreliable above roughly 6 m, so 8–12 m poles generally need microwave sensors or zone-level detection instead.
Document the dimming schedule so a lot measured after midnight is compared with its dimmed design value.
Spill Light and Glare Toward Neighbours
Car parks often sit beside houses, roads and hotel windows, and light trespass is far cheaper to prevent at layout than to fix with shields after a complaint.
- Turn the boundary row around. Back-to-back heads beside a boundary send half their light over the fence. Use a single forward-throw head facing into the lot on those poles.
- Choose optics by what is behind the pole. A Type IV or house-side-shielded distribution limits backlight, and the IES TM-15 BUG rating (backlight, uplight, glare) lets you compare fixtures on it.
- Keep area heads flat. Tilting a pole-top head for reach adds uplight and glare; change the distribution or pole position instead.
- Keep flood tilt modest. On corner poles facing a boundary, stay under about 70° from vertical and evaluate asymmetric floods.
- Check the obtrusive-light limits. Many authorities follow the environmental-zone approach of CIE guidance, limiting light at neighbouring windows and upward light, and DarkSky International publishes guidance local ordinances often borrow. Put a boundary calculation plane in the model from the start.
Remote and Off-Grid Lots: The Solar Option
Park-and-ride sites, trailheads, rural depots and overflow lots often sit far from a supply, where trenching costs more than the lighting. Solar lighting fits these well when the target is P-class level: low-wattage heads on 4–8 m poles, spaced at about 3–3.5 × height because solar heads run lower peak lumens than grid fixtures.
Two limits apply. Size against the worst month of sun, not the annual average, with battery autonomy for cloud runs. And keep the load realistic: a 185 W head, the size the retail example below arrives at, running 12 hours needs about 2.2 kWh a night before dimming, a large split system per pole. High-lux retail lots are usually a grid job; off-grid lots are designed to the lower class with motion dimming. The architecture choice, battery chemistry and sizing method are covered in the solar street lights complete guide.
Worked Example: 120 × 60 m Retail Lot, Centre-Island Twin Heads
This example deliberately differs from the corner-pole scenario in the flood guide: a larger lot, interior poles and flat pole-top heads instead of tilted floods.
Inputs
| Input | Value | Why |
|---|---|---|
| Lot | 120 × 60 m = 7,200 m² | Open surface, bays running the long direction |
| Target | 30 lux maintained average | Client input, matching the site’s public-parking figure; replace with the governing value |
| Pole height | 10 m | Tall enough for a 15 m forward throw per head with a flat mount |
| Layout | 2 island rows, 4 poles per row, 2 heads per pole = 16 heads | Rows at 15 m and 45 m across the lot |
| Utilisation factor (UF) | 0.65 | Interior poles land most flux on the lot; losses at edges and ends |
| Maintenance factor (MF) | 0.8 | Low end of the 0.8–0.9 range for sealed IP65 LED, allowing for exhaust grime |
| Head efficacy | 140 lm/W | Planning assumption; use the LM-79 figure of the actual head |
Step 1: geometry check. The island rows sit 30 m apart, so each long edge is 15 m (1.5 × height) from its row and the centre line is 15 m from both. Poles along each row sit at 15, 45, 75 and 105 m, which is 30 m apart (3.0 × height) with the end poles at half spacing from the short edges. That is inside the 3.5–4 × rule on purpose: an area has no neighbouring pole beyond its ends and must hold uniformity in both directions.
Step 2: required lumens.
30 lux × 7,200 m² ÷ (0.65 × 0.8) = 216,000 ÷ 0.52 ≈ 415,000 lm installed
Step 3: lumens and wattage per head.
415,000 ÷ 16 heads ≈ 26,000 lm per head
At 140 lm/W that is about 185 W; at 160 lm/W, about 162 W. In our street range it lands on the 180–200 W steps of the higher-power series (Platypus 180 W, Modular 200 W). If the governing target is 20 lux instead of 30, multiply by 0.67 and the heads drop to about 17,300 lm, roughly 120–130 W at 140 lm/W.
Step 4: optics and uniformity. Outward heads on each row throw 15 m to the long edge; inward heads throw 15 m to the centre, where both rows overlap. The overlap makes the centre line brighter than the edges, so the minimum on the grid will usually sit along the long edges and in the corners. Type III heads suit this throw; on any row beside a residential boundary, the outward head becomes a Type IV or shielded distribution, and the calculation is re-run for that edge.
Step 5: compare with the corner-pole approach. The flood guide’s car park installs 8 × 200 W over 4,000 m², about 0.40 W/m². This lot installs 16 × 185 W over 7,200 m², about 0.41 W/m². Similar factors give similar power density; the layout changes where the light lands, with no tilt glare and no dark ground behind the poles.
Step 6: verify in DIALux. The lumen method only sizes the fixtures. The calculation with each head’s IES file must show:
- average maintained illuminance at or above the target, at the stated MF;
- the minimum and the uniformity ratio against the governing criterion, with the corners and long edges checked explicitly;
- vertical or semi-cylindrical illuminance if the brief includes face recognition;
- light at the boundary calculation plane against the obtrusive-light limit;
- the dimmed-hours levels, if time-step dimming is part of the design.
If the edges fail, the usual fixes in order are a wider or longer-throw outward optic, moving the rows toward the edges, and then adding a short perimeter row. Adding watts to every head is the last resort, because it raises the average without fixing the minimum.
The Bottom Line
Choose the layout before the fixture: short poles for low-level car parks, corner floods for mid-size lots, interior poles once perimeter poles cannot reach the centre. Then set the level from the governing standard, size lumens with stated UF and MF, and sign off on a calculation that checks minimums, faces and the boundary, not just the average.
Send us the site plan and the target level, and we will return a free DIALux layout with pole positions, heights, fixture schedule, uniformity and boundary spill, using the IES files of the fixtures we quote.
FAQ
How far apart should parking lot light poles be? About 3.5–4 × mounting height along a row, nearer 3 × height across an open area: 18–24 m on 4–6 m poles, about 30 m on 10 m interior poles. The photometric calculation sets the final figure.
What lux level does a parking lot need? It depends on the standard. EN 13201 P-classes run from 2 to 15 lux average with a minimum point, parking areas typically P4–P5; IES RP-20 works mainly in minimums and max:min ratios. Our flood guide uses 30 lux average as the upper band for public parking. Quote any figure with its standard and maintained basis.
How tall should parking lot light poles be? 4–6 m for low-level car parks lit by pole-top heads, 10–12 m for corner flood poles, 8–10 m with twin heads for large retail lots lit from islands, and high-mast from 20 m upward for very large truck or coach parks.
How many watts do LED parking lot lights need? Use the lumen method: target lux × area ÷ (UF × MF), divided by the number of heads and the measured lm/W. The 120 × 60 m example at 30 lux, UF 0.65 and MF 0.8 needs about 26,000 lm per head, roughly 160–185 W at 140–160 lm/W, or about 120–130 W heads at 20 lux.
Should parking lot lights be 3000K or 4000K? 4000K is the usual car park choice. Use 3000K beside housing or wildlife-sensitive areas, or where the authority caps colour temperature, and pair either with CRI 80 or better.
Are flood lights or area lights better for a parking lot? Flat area heads give lower glare and spill wherever poles can stand inside the lot; floods win when poles can only go at corners or on buildings.
Can solar lights be used for a parking lot? Yes, for remote lots designed to low P-class levels, sized against worst-month sun with motion dimming. High-lux retail lots are usually better served from the grid.